Difference between revisions of "IPv6: Router Ubuntu"
Jump to navigation
Jump to search
Onnowpurbo (talk | contribs) |
Onnowpurbo (talk | contribs) |
||
| Line 16: | Line 16: | ||
===Skenario 1: Alokasi Stateless untuk LAN lokal=== | ===Skenario 1: Alokasi Stateless untuk LAN lokal=== | ||
| + | |||
| + | '''GATEWAY''' | ||
| + | |||
| + | Install radvd | ||
| + | |||
| + | sudo aptitude install radvd | ||
| + | echo 1 > /proc/sys/net/ipv6/conf/all/forwarding | ||
| + | |||
| + | |||
| + | interface eth0 | ||
| + | { | ||
| + | AdvSendAdvert on; | ||
| + | prefix 2001:xxxx:xxxx::/64 | ||
| + | { | ||
| + | AdvOnLink on; | ||
| + | AdvAutonomous on; | ||
| + | }; | ||
| + | }; | ||
* Aktifkan IPv6 Address Forwarding | * Aktifkan IPv6 Address Forwarding | ||
* Aktifkan Router Advertisement | * Aktifkan Router Advertisement | ||
| − | |||
===Skenario 2: Routing Statik untuk LAN Lokal=== | ===Skenario 2: Routing Statik untuk LAN Lokal=== | ||
Revision as of 08:51, 2 February 2019
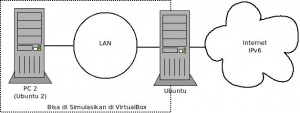
Berikut adalah langkah yang perlu dilakukan untuk membuat sebuah router IPv6 sederhana menggunakan Ubuntu.
Akses ke IPv6 Internet
- 6project.org
- HurricaneElectric (HE)
Perhitungan Subnet IPv6
Siapkan OS Ubuntu
Skenario 1: Alokasi Stateless untuk LAN lokal
GATEWAY
Install radvd
sudo aptitude install radvd
echo 1 > /proc/sys/net/ipv6/conf/all/forwarding
interface eth0
{
   AdvSendAdvert on;
   prefix 2001:xxxx:xxxx::/64
   {
        AdvOnLink on;
        AdvAutonomous on;
   };
};
- Aktifkan IPv6 Address Forwarding
- Aktifkan Router Advertisement
Skenario 2: Routing Statik untuk LAN Lokal
GATEWAY
Kondisi Gateway
echo 0 > /proc/sys/net/ipv6/conf/all/forwarding
- Interface tun0 IPv4 10.8.0.21/24 dan IPv6 2a07:1c44:212:c0ca:87e8::/80
echo 0 > /proc/sys/net/ipv6/conf/tun0/forwarding
ip route add ::/0 dev tun0
- Interface enp3s0
echo 0 > /proc/sys/net/ipv6/conf/enp3s0/forwarding
ip addr add 2a07:1c44:212:c0ca:87e8:1000::1/84 dev enp3s0
ip -6 route add 2a07:1c44:212:c0ca:87e8:2000::/84 via 2a07:1c44:212:c0ca:87e8:1000::100
CLIENT di VirtualBox
- Set IPv6 Static
echo 0 > /proc/sys/net/ipv6/conf/all/forwarding
ip addr add 2a07:1c44:212:c0ca:87e8:1000::100/84 dev enp0s3
ip addr add 2a07:1c44:212:c0ca:87e8:2000::100/84 dev enp0s3
ip -6 route add 2a07:1c44:212:c0ca:87e8::/84 enp0s3
ip -6 route add 2a07:1c44:212:c0ca:87e8::/84 via 2a07:1c44:212:c0ca:87e8::2/84
ip -6 route add ::/0 via 2a07:1c44:212:c0ca:87e8::2/84
Skenario 3: Alokasi subnet untuk salah satu PC / Router di LAN
- Aktifkan IPv6 Address Forwarding
- Set IPv6 Static
